Where to find it: Manage → Devices → click a device name
The Device Details page is your control room for a single device. From one screen you can:
• View device status
• Monitor the content currently on screen
• Review device information
• Perform remote actions
• Schedule maintenance activities
• Review device history
• Add internal notes
It’s especially useful when troubleshooting issues, verifying content updates, or managing devices remotely.
Note Everything on this page updates automatically in real time, so there’s no need to refresh.
Before You Begin
Before managing a device:
• Make sure the device has been added to the platform.
• Confirm you have permission to access device management.
• Verify the device appears in the Devices section.
Accessing Device Details
To Open Device Details
1. Navigate to Devices.
2. Locate the device you want to manage.
3. Click the device name.
4. The Device Details page opens.
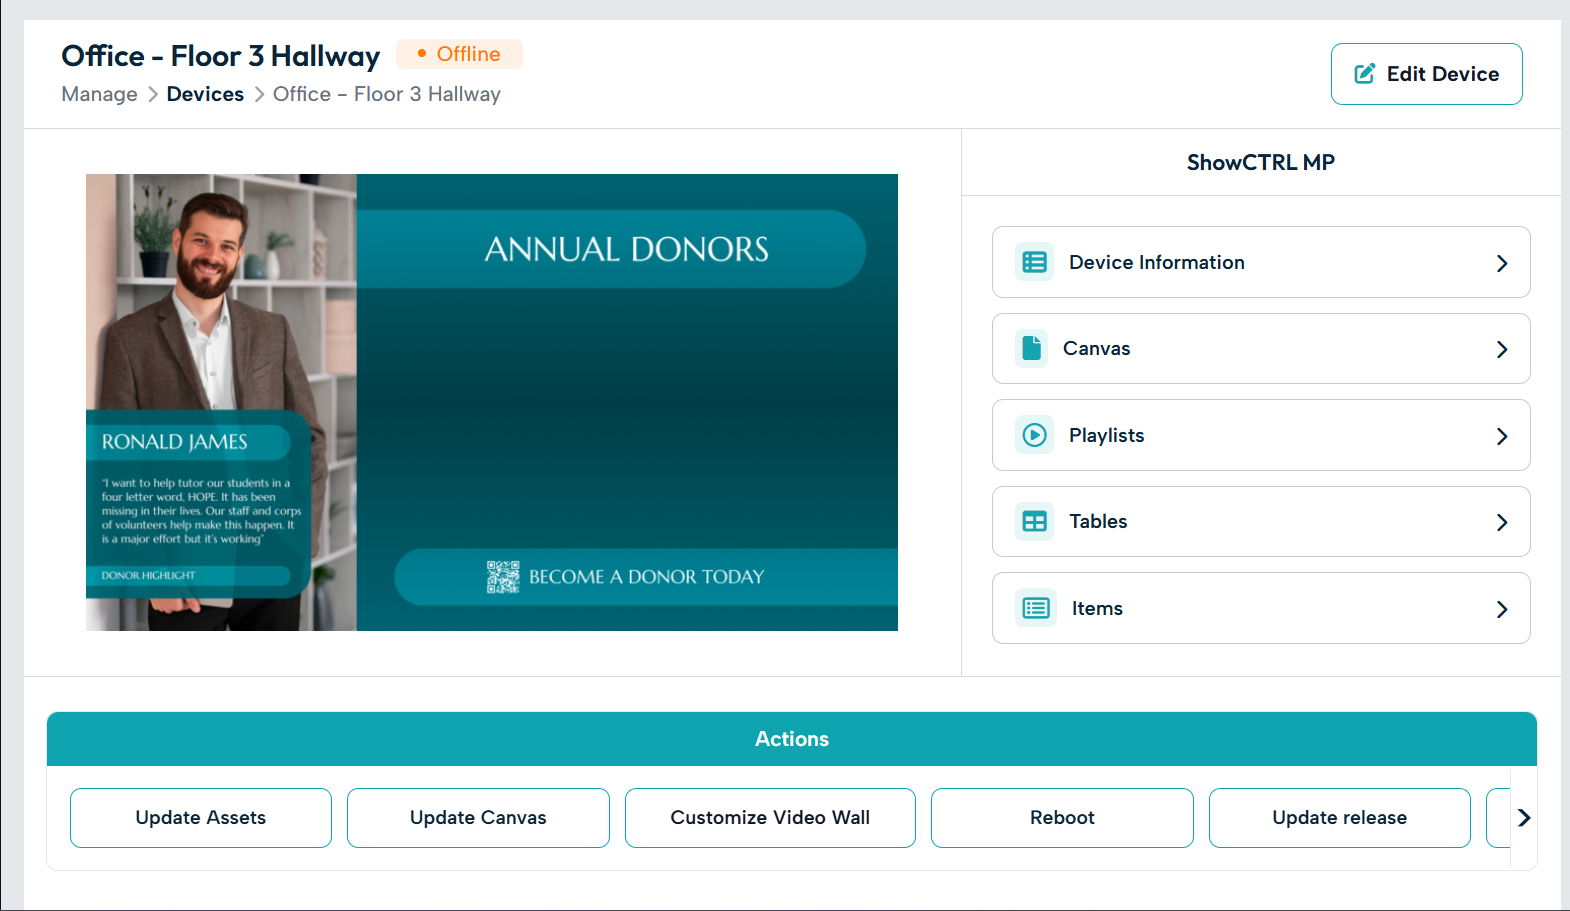
Viewing Device Information
The Device Information section gives a quick overview of the device, commonly including its name, current status, last communication (check-in) time, software version, display information, and assigned content. This helps you verify that the device is operating correctly.
Live Device Preview
The Live Preview shows the content currently displayed on the physical screen, letting you verify what’s showing without being on-site. It refreshes automatically whenever the device sends a new capture.
Common uses:
• Confirming content updates
• Reviewing donor recognition displays
• Verifying playlist playback
• Troubleshooting display issues

Reviewing Assigned Content
The page also shows the content currently assigned to the device, which, depending on your configuration, may include Canvases, playlists, donor recognition content, and interactive experiences. When troubleshooting, this helps you quickly confirm what should be displaying on screen.
Device Actions
Device Actions let you perform tasks remotely without physically accessing the device. The available actions vary by device type and configuration.
To Run a Device Action
1. Open the Device Details page.
2. Locate the Actions section.
3. Select the action you want.
4. Provide any requested input, or confirm the action if prompted.
5. The device receives the instruction the next time it communicates with the platform.
Note Depending on the action, it may run immediately, ask you to confirm first, or open a small window asking for input: a number, a choice from a list, or a short piece of text.
Common actions include refreshing content, restarting services, running maintenance tasks, and updating configuration settings.
Scheduled Actions
Scheduled Actions let you plan device tasks in advance — useful for content updates, maintenance, system refreshes, and event preparation.
To Schedule an Action
1. Open the Device Details page.
2. Navigate to Scheduled Actions.
3. Select the action you want.
4. Choose a date and time.
5. Save the schedule.
The action then runs automatically at the specified time; for example, scheduling a content refresh the morning before a fundraising event begins.
Activity History
Activity History is a record of actions performed on the device, helping you understand what changed, when it happened, and whether each action completed successfully.
To View Device History
1. Open the Device Details page.
2. Navigate to Activity History.
3. The log displays recent device activity.
Examples of logged activity include content updates, scheduled actions, maintenance activities, and status changes. Each entry shows its progress, and any failed action includes a message explaining what went wrong.
Device Notes
Notes let your team document important information about a device, creating a shared record other administrators can review, such as installation details, maintenance records, troubleshooting observations, and hardware replacement information.
There are two separate notes areas, so you can control who sees what:
|
Notes area |
Who can see it |
|
Admin notes |
Visible to admin users only. |
|
Public notes |
Visible to everyone with access to the device. |
To Add a Note
1. Open the Device Details page.
2. Navigate to the notes area you want (Admin or Public).
3. Click Add Note.
4. Enter the information.
5. Save the note.
Tip You can tag a colleague with an @mention to notify them — handy for handing off an issue. Example note: “Device moved to the reception area on June 10.”
Health Labels
A Health Label is a label you set manually to record why a device needs attention. Unlike the live status (Online, Offline, Suspended), which the device reports on its own, a Health Label is set by your team for internal coordination.
Important A Health Label is purely an internal note. It has no effect on the device itself. It simply helps your team keep track of what’s going on.
Typical labels include:
• No Issues
• Offline – Investigate
• Offline – Replacement En Route
• Offline – Unreliable WiFi
• Error – Hardware Issue
• Error – Software Issue
Using Health Labels consistently helps teams prioritise support, track ongoing issues, communicate clearly, and avoid duplicating troubleshooting effort.
Monitoring Device Performance
When reviewing a device, a quick checklist helps confirm everything is healthy:
• Device status is Online.
• Live Preview matches the expected content.
• Recent actions completed successfully.
• No unresolved health labels remain.
• Notes are current and accurate.
Best Practices
• Review devices regularly. Monitor status to catch issues before they affect viewers.
• Verify content after publishing. Use Live Preview to confirm updates were applied correctly.
• Document important changes. Use Notes to track maintenance, moves, and hardware replacements.
• Use health labels consistently. Apply a label whenever a device needs attention.
• Schedule maintenance during off-hours. Reduce disruption by scheduling actions outside peak usage times.