![OA_Logo-600x600-1.png]](https://www.omnially.com/hs-fs/hubfs/OA_Logo-600x600-1.png?height=40&name=OA_Logo-600x600-1.png)
Where to find it: Projects → select a project → Project Files
Project Files is a folder-based store for the documents related to a Project. Instead of hunting through emails, shared drives, or local folders, your team keeps important documentation organised and accessible from within the Project itself.
Common file types include:
• Installation drawings and floor plans
• Site photos
• Product documentation
• Contracts and warranty documents
• Training materials
• Customer-provided assets
Keeping documentation here improves collaboration, simplifies support, and preserves important project information over the life of the installation.
Note On a Project shared by more than one company, each company has its own separate set of files: files aren’t shared between companies.
Before You Begin
Before working with Project Files:
• Make sure you have permission to manage project documentation.
• Verify you’re working within the correct Project.
• Confirm any files you plan to upload are available on your computer.
Accessing Project Files
To Open Project Files
1. Navigate to Projects.
2. Open the Project you want.
3. Select Project Files.
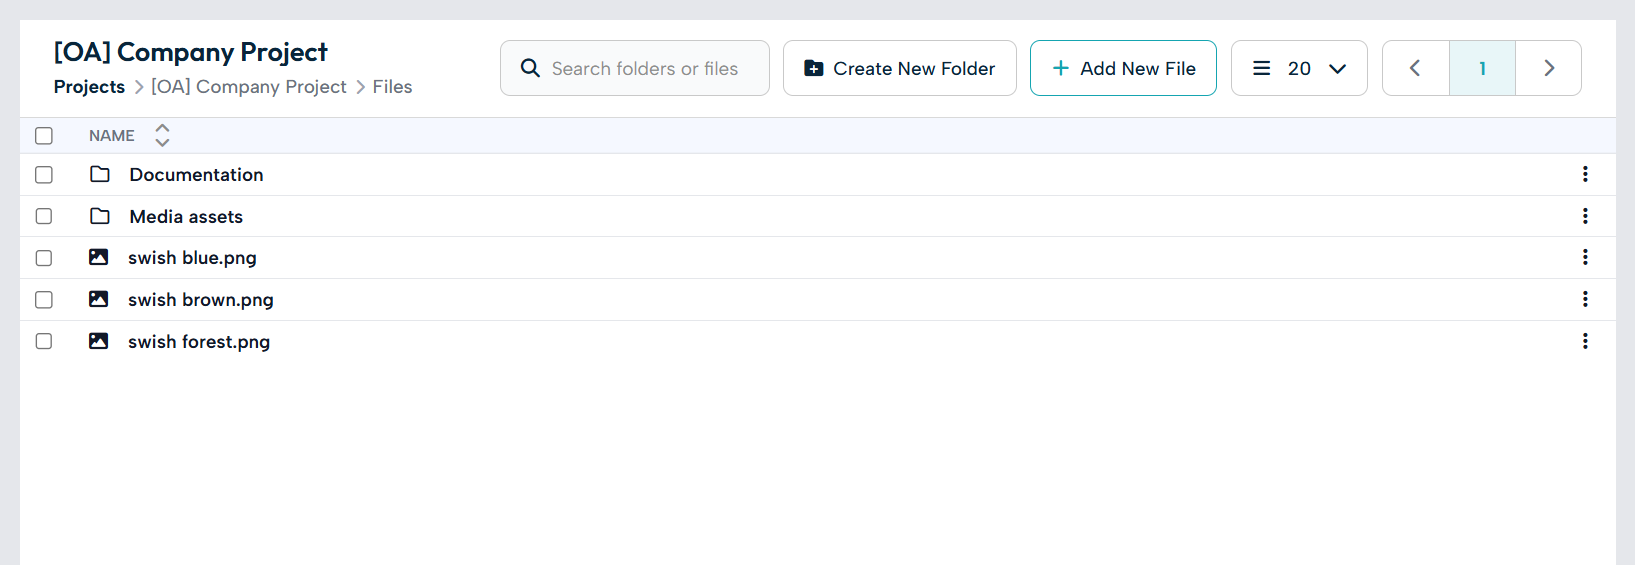
4. The section displays all folders and documents for the Project.
Getting Around
The list shows the contents of the current folder, with folders listed before files. Click a folder to open it. When you’re inside a folder, a Back button and a breadcrumb trail at the top show where you are and let you step back up.
Tip The search box searches everything in the current location (including nested folders) and shows where each result lives, so you can find a document even if you don’t remember which folder it’s in.
Creating Folders
Folders keep documents organised within a Project.
To Create a Folder
1. Open Project Files (and the folder you want to create it inside, if nested).
2. Select Create New Folder.
3. Enter a folder name.
4. Save the folder.
Note The system checks for name clashes, so you can’t create two items with the same name in the same place.
Uploading Files
To Upload Files
1. Open Project Files and navigate to the folder you want.
2. Select Add New File.
3. Choose the file (or several files) from your computer.
4. Confirm the upload.
The files are added to the current folder. You can upload more than one file at a time.
Renaming, Moving, Downloading, and Deleting
Folders and files can be managed from the list. The available actions are:
|
Action |
Applies to |
What happens |
|
Rename |
Folders and files |
Enter a new name; the system checks for clashes. |
|
Move to folder |
Folders and files |
Choose a different destination folder; the item moves without re-uploading. |
|
Download |
Files |
Downloads the file to your device. |
|
Delete |
Folders and files |
Asks you to confirm first. |
You can also select several items at once to move them together or delete them in one step.
Important Before deleting, check the item is no longer needed, and that any newer version has already been uploaded if it’s being replaced.
Organising Your Files
A clear folder structure makes documents easier to find as a Project grows. There’s no required layout, but a structure like this works well for most installations:
• Contracts
• Installation Drawings (e.g. Initial Design, Approved Drawings, Final As-Built)
• Site Photos
• Product Documentation
• Training Materials
• Warranty Information
Naming Files Clearly
Descriptive names make documentation much easier to manage:
|
Use names like… |
Avoid names like… |
|
Approved Installation Drawing |
Drawing 1 |
|
Final Site Photos |
New File |
|
Warranty Certificate |
Final Final Version |
Keeping Track of Versions
Project Files doesn’t keep an automatic version history, so it’s worth handling revisions deliberately. A simple approach:
1. Upload the revised file.
2. Confirm the new version is correct.
3. Remove outdated versions if appropriate.
4. Let relevant team members know.
Tip Use file names that make the version obvious: for example Donor Wall Layout v1, Donor Wall Layout v2, Donor Wall Layout Final.
Best Practices
• Keep files organised. Use folders and consistent naming conventions.
• Upload documentation promptly. Add documents as soon as they become available.
• Store final versions. Retain approved and finalised documents whenever possible.
• Review files periodically. Remove outdated or duplicate documents.
• Centralise documentation. Keep project information within the Project rather than relying on email attachments.