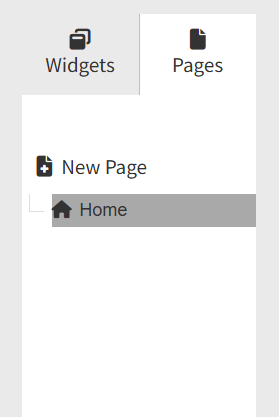
Where to find it: Canvas editor → left sidebar → Pages tab
Pages are the individual screens that make up a Canvas. Every Canvas contains at least one page, and larger projects often contain several pages that work together to create a complete presentation or experience.
Examples include:
• Welcome screens
• Donor recognition pages
• Sponsor displays
• Event schedules
• Information screens
Pages can be displayed manually or rotated automatically based on rules you configure.
Before You Begin
Before creating or managing pages:
• Make sure you have access to the Canvas editor.
• Open the Canvas you want to modify.
• Familiarise yourself with the Pages panel on the left side of the editor.
Accessing Pages
The Pages tab displays all pages within the current Canvas. From here you can create, rename, duplicate, delete, and select pages for editing.
Creating a Page
To Create a New Page
1. Open the Pages tab.
2. Click + New Page.
3. A new page is created and named automatically. The page list is sorted alphabetically.
4. Rename the page if you’d like a clearer name (see below).
5. Begin adding widgets to your page.
Tip The very first page you create becomes the Home page: the screen shown first when the Canvas loads on a device. See Understanding the Home Page below.
For example, a fundraising display might include a Welcome page, a Campaign Overview page, a Donor Recognition page, and a Thank You page, each created as a separate page.
Renaming a Page
Clear page names make larger projects much easier to manage.
To Rename a Page
1. Open the Pages tab.
2. Locate the page you want to rename.
3. Double-click the page name.
4. Enter a new name.
5. Press Enter to save.
Best practice: use descriptive names so pages are easy to identify at a glance.
|
Use names like… |
Avoid names like… |
|
Major Donors |
Page 1 |
|
Event Sponsors |
New Page |
|
Welcome Screen |
Untitled |
Tip Because the page list is ordered alphabetically, thoughtful names also help keep related pages grouped together in the list.
Duplicating a Page
Duplicating a page is a quick way to reuse an existing layout.
To Duplicate a Page
1. Open the Pages tab.
2. Locate the page you want to copy.
3. Click the Duplicate icon.
The copy includes everything from the original:
• All widgets
• Layout and positioning
• Widget settings
• Page settings
Common uses: creating multiple sponsor pages, reusing donor recognition layouts, or building language variations of the same screen.
Deleting a Page
To Delete a Page
1. Open the Pages tab.
2. Locate the page you want to remove.
3. Click the Delete icon.
4. Confirm the action.
Deleting a page removes the page itself and all widgets on it.
Important Deleting a page can’t be undone once saved. If you delete the Home page, the next available page automatically becomes the new Home page — so double-check which page will take over before deleting.
Understanding the Home Page
The Home page is the default starting screen for a Canvas. When the Canvas first loads on a device, the Home page is displayed first. For example, a donor wall might start with a welcome screen before automatically rotating through additional pages.
Page Settings
Page settings apply to the whole screen rather than to an individual widget.
To View Page Settings
1. Open the page you want to configure.
2. Click an empty area of the Canvas so that no widget is selected.
3. The Settings panel displays the page settings.
Configuring Page Timeouts
A timeout controls when a page automatically moves on to another page, letting content rotate without anyone needing to interact with the screen.
Timeout Options
|
Option |
What it does |
Best for |
|
None |
The page stays visible until another action changes it. |
Interactive experiences, static displays, home screens. |
|
Manual |
The page advances after a number of seconds you set. |
Timed rotations: e.g. show a sponsor page for 10 seconds. |
|
Playlist |
The page advances when a chosen Playlist widget on the page finishes playing. |
Video content, media presentations, automated playback. |
|
Donor List |
The page advances when a chosen Donor List widget reaches the end of its lists. |
Donor recognition displays, rotating donor lists, fundraising walls. |
Tip The Playlist and Donor List options advance based on a specific widget you select on the page, so the page needs to contain that widget for the timeout to work.
Configuring Return Pages
A Return page determines where the Canvas goes after a timeout completes. For example, with a sequence of Welcome → Major Donors → Community Donors → Thank You, the Canvas can return to the Welcome page after the final page finishes and begin the cycle again.
To Configure a Return Page
1. Go to the Pages tab located on the left panel.
2. Select a page.
3. Set a timeout (Manual, Playlist, or Donor List).
4. Locate the Return page setting.
5. Choose the page to display next.
Important The Return page setting only appears once a timeout is set. If you don’t see it, set a timeout first.
Page Transitions
Transitions are the animations that play when a page appears or disappears. They help create a smoother, more polished viewing experience — improving visual flow between pages and adding polish to digital signage and presentations.
To Configure Page Transitions
1. Go to the Pages tab located on the left panel.
2. Select a page.
2. Open Page settings.
3. Locate the Transition options.
4. Select the transition effect you want (choose None for no animation).
5. Save your changes.
Best Practices
• Use consistent naming. Meaningful names make pages easy to identify, especially as projects grow.
• Duplicate before major changes. Create a copy before significantly reworking a layout, so you can fall back if needed.
• Use timeouts strategically. Avoid changing pages too quickly, give viewers enough time to read and absorb the content.
• Test page sequences. Always preview page navigation before publishing to devices.
• Keep page counts manageable. Group related information together rather than creating unnecessary pages.