Ensuring Proper Samsung Settings on a New Screen
In the initial setup of a Samsung LCD/LED, steps are taken to ensure that the settings are proper for 24/7 use.
Initial Setup Note: During initial display setup it's important that the orientation be selected as "Landscape" and not "Portrait", even if the screen is actually portrait. The computer compensates for the orientation on its side, and so having "Portrait" selected on the screen actually makes things more complicated.
Note: Make sure the media player is plugged into power and HDMI (or whichever video source you opt to use), and is turned on before starting setup below.
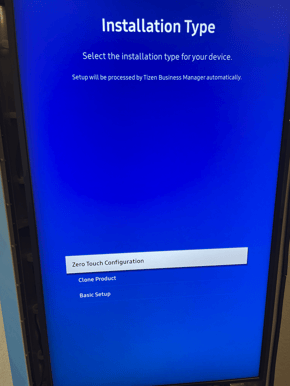
1. Installation Type
Select "Basic Setup"
2. Orientation
Always select "Landscape"
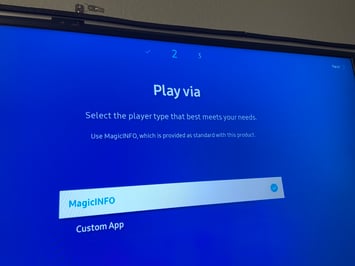
3. Play Via
Select MagicINFO
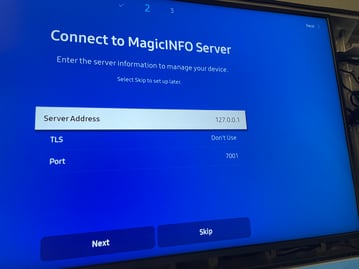
4. Connect to MagicINFO Server (don't)
Press Skip
5. Set Date & Time
Set as appropriate, or skip - it's not generally used.
6. Set PIN
This ensures that the settings can't be changed or turned off unwittingly.
- Enter the PIN, if you want to add one.
- Change the PIN by entering it twice on the screen as prompted.
- Your IT administrator or manager will provide the PIN to use.
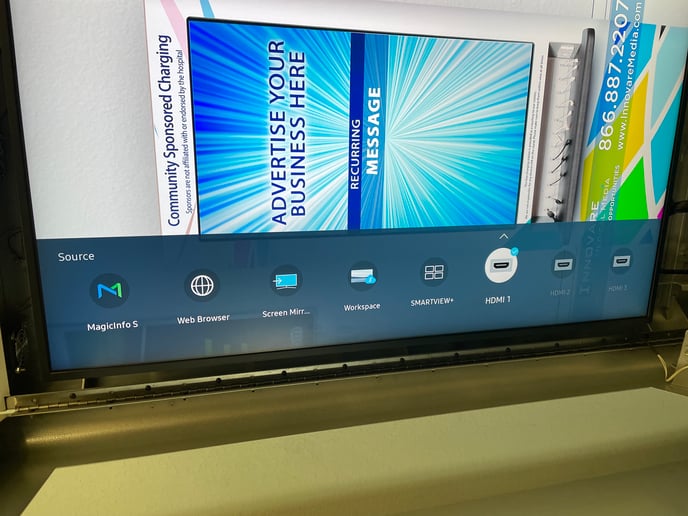
7. Set Source
Setup should now be completed. Go ahead and point the source to HDMI (or whichever input is used on the LCD).
- On the remote, Press SOURCE, then press the right or left arrow until landing on HDMI 1 or HDMI2, whichever port the HDMI cable is connected to.
- If the HDMI cable is ever reconnected to a different port, repeat the above step.
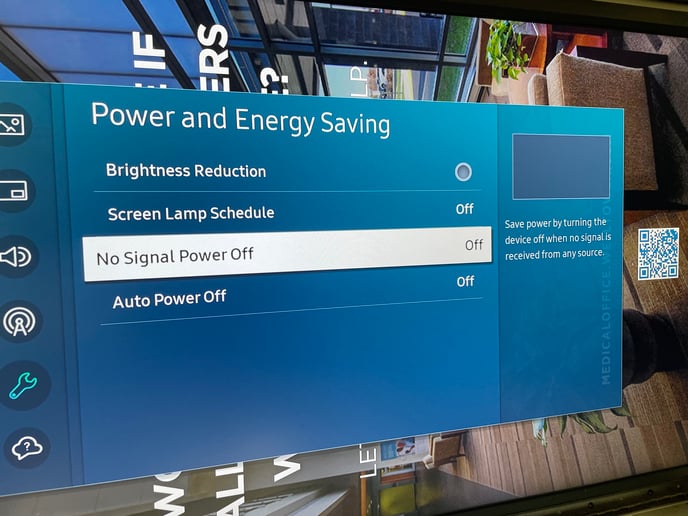
8. Power and Energy Saving Settings
This is so that the screens don't turn off on their own after a period of inactivity, ensuring 24x7 runtime.
- On the remote, press MENU, go to System, then select Power and Energy Saving.
- Set all the values to OFF.
9. Power Control Settings
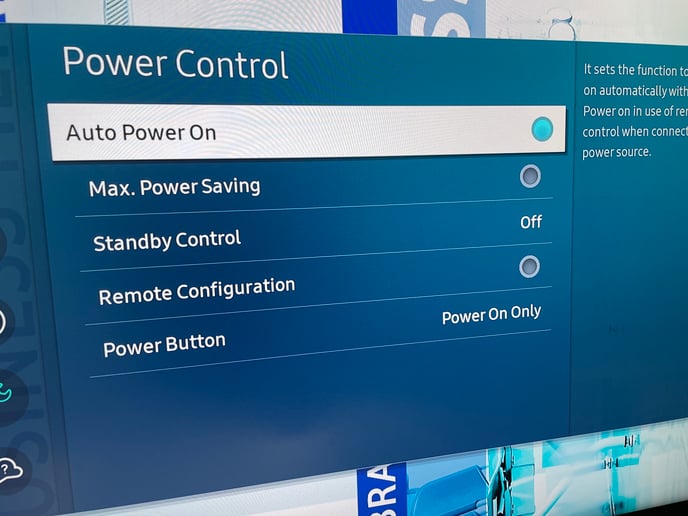
This ensures that if there's a power outage, the screen will come back on when the power returns, without manually turning the screen on.- On the remote, press MENU, go to System, select Power Control.
- The settings should be:
- Auto Power On: On
- Max. Power Saving: Off
- Standby Control: Off
- Remote Configuration: Off
- Power Button: Power On Only
10. Lock the Screen (if applicable)
If your administrator requires it, lock the screen. To do this, press "Lock" on the remote control to lock the screen.
Tip: To unlock it in the future, press Lock on the remote, and enter the PIN.
Note: If you unlock it, make sure to re-lock it and test the lock before leaving. It will not automatically re-lock on its own.
Note: To test that the remote is locked, press any key, including "Power Off", and it should prompt you for a PIN.